
Husky Pallet Rack Installation Instructions
Invincible, Reliable, and TUF Brands
Follow these steps when installing Husky pallet rack. Always follow the manufacturer’s requirements and safety instructions.
For questions, call Husky at 1-800-438-5629.
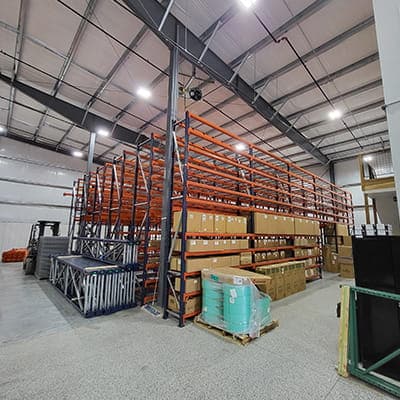
Step-by-Step Installation Guide
Step 1: Check Your Materials
- Compare all materials with the packing slip.
- Make sure all components are included and in good condition.
- Do not install damaged components.
Step 2: Position the Uprights
- Identify the front of each upright. The front post has the diagonal bracing channel welded closest to the floor.
- Position the front of each upright toward the aisle.
- For a single row with aisles on both sides, face the front toward the aisle with the most traffic.
Step 3: Install the First Set of Beams
- With help, install a beam at the desired height between the front posts of two uprights.
- Install the matching beam on the back side.
- Make sure all beam connections and safety clips are properly engaged.
Step 4: Check Level, Plumb, and Square
Check the first bay before continuing.
- Plumb (uprights): No more than ½ inch out of plumb per 10 feet of height.
- Level (beams): No more than ⅛ inch out of level per 6 feet of beam length.
- Square (bay): Measure both diagonals. The measurements must be within ⅛ inch of each other.
- Use shims as needed to maintain these tolerances.
Step 5: Install Additional Bays
- Repeat Steps 3 and 4 for each additional bay.
- Check each bay for level, plumb, and square as you go.
Step 6: Install Additional Beam Levels
- Install the remaining beam levels using the same method as Step 3.
- Continue checking each bay for level, plumb, and square.
- Maintain at least 6 inches of clearance between the top of the pallet load and the bottom of the beam above it.
Step 7: Install Row Spacers and Accessories
- Install wall or row spacers at the top and bottom of the uprights.
- Secure spacers with nuts and bolts.
- Use at least two row spacers per upright when row spacers are used.
- Install accessories, such as pallet crossbars and wire decking, as required by the approved rack design.
Step 8: Anchor and Complete the Installation
- Perform a final check to confirm all rack is level, plumb, and square.
- Anchor all uprights to the floor using the specified anchors.
- If the rack height-to-depth ratio is 6:1 or greater, consult the supplier for additional bracing requirements.
Step 9: Secure Beams with Bolts When Required
Beams must be bolted in place when:
- Safety clips do not engage properly.
- Beams are installed over aisles.
- Unusual conditions exist, such as tight load clearances, narrow aisles, or large, bulky loads.
- Beams are located where connections are difficult to inspect.
Required bolt sizes:
| Beam size | Bolting method | Hardware |
| 3.5", 4.0", and 4.5" beams | Side bolt | 7/16" × 4" hex bolts and nuts with 7/16" flat washers |
| 5.0", 5.5", and 6.0" beams | Top bolt | 7/16" × 4" hex bolts and nuts with 7/16" flat washers |
| When side or top bolting is not possible | Front bolt through the safety clip hole | 3/8" × 1" hex bolts and nuts with 3/8" flat washers |
Lateral ties: Beams longer than 112.5 inches require lateral ties. Standard Waterfall Wire Decking or Flanged Crossbars may be used where approved for this purpose.
Step 10: Establish a Regular Inspection Program
Inspect the rack regularly, preferably as part of the monthly safety inspection.
Check for:
- Properly connected beams.
- Safety clips that are present, intact, and fully engaged.
- Damaged uprights, beams, or other components.
- Overloaded beams or uprights.
Remind all forklift operators to report rack damage to their supervisor immediately.
If a rack deficiency is found:
- Immediately unload the affected area.
- Replace damaged components before returning the area to service.
- If a safety clip is defective, the beam may be bolted in place only using an approved method. Replace the clip as soon as possible; replacement clips are available through Husky Customer Service.
Important safety reminder: Protective devices do not replace regular rack inspections. Installation, anchoring, bracing, beam connections, and load capacities must comply with the manufacturer's requirements and applicable safety standards.